A Step-by-Step Guide to Replace Your Commode

There are some types of home plumbing jobs that fall in the grey area—they’re not necessarily something you need a professional to do, but they may require more than a basic understanding of plumbing techniques. Installing a toilet is one of those jobs. If you’re simply replacing a defective or cracked one with the same model, it may be as simple as putting it in place, locking it down and connecting the water lines. But if it’s a redesign or a different toilet, it can become complicated in a hurry. Here’s a step-by-step guide for the more complicated installations.
Step One—Measure
You need to make certain the new toilet will fit. The best approach is to measure from the wall behind the toilet to the bolts closest to that wall. You’ll need to get a new toilet with a base small enough to fit. If the toilet is located in an alcove, you may also want to measure from the side walls, so that you don’t buy a toilet that’s too big for the opening.
Step Two—Removing the Old Toilet
Turn off the water supply to the toilet. Hopefully, there’s a shut-off valve on the line into the tank. Flush the toilet. If you still have water in the tank or bowl, use either a small cup or towels (paper towels will work) to collect all remaining water. Disconnect the water line. Unscrew the bolts holding the tank to the bowl and take the tank off (you can lift the whole toilet at one time, but it’s extremely heavy). Remove the caps over the bolts at the base of the bowl and unscrew the bolts. The bowl will likely not move freely, as there’s a wax gasket at the bottom. You’ll need to rock the toilet to break the seal on the wax gasket. Clean any remaining wax off the mounting surface and level the mounting surface.
Step Three—Installing the New Toilet
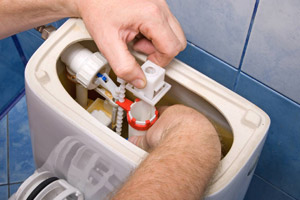
It’s basically the reverse order of the removal of the old toilet. Once you’ve made certain that your flanges and bolts are not broken or deteriorated, turn the bowl upside down and place the wax ring around the waste hole with the tapered end abutting the bottom of the bowl. Carefully flip over and put in place. Tighten the nuts on the bolts equally—a few turns on each side at a time. Once the bowl is secure, replace the caps over the bolts. Install the rubber gasket over the bottom of the tank and then insert the tank bolts and washers from the inside of the tank. Tighten the nuts until the tank is secure. Install the float and innards of the tank per the manufacturer’s instructions. Hook up the water line and test the toilet.
Contact Public Service Plumbers
To learn how we can help you, call (214) 753-4633 or contact us by e-mail and we’ll schedule an appointment.
At Public Service Plumbers, we answer our phones 24 hours a day, seven days a week. We can send our service personnel to your home or business anytime, day or night. All of our plumbers are factory-trained and factory-certified.
Public Service Plumbers
5610 Dyer Street
Dallas, Texas 75206
(214) 753-4633
We offer plumbing installation and repair services to individuals and businesses throughout the Dallas-Fort Worth area, including Highland Park, University Park, Preston Hollow, Lakewood, Lake Highlands, Richardson, Plano, Frisco, McKinney, Allen, Coppell, Garland, Mesquite, Addison, Kessler Park, Farmers Branch, Grapevine, Southlake, Flower Mound and Lewisville.


